Collect payments for unpaid Linnworks direct orders quickly with the Linnworks app for Stripe – the secure & cost-effective online payment system
2. Linnworks Direct Orders and Payment:
3. Stripe Payment History and Purchase Credit:
4. Making Online Payment with Linnworks App:
Basic Edition: (Up to 50 Orders per month): £5 + VAT per month
Pro Edition: (Up to 100 orders per month): £10 + VAT per month
Enterprise Edition: (Up to 500 Orders per month): £45 + VAT per month
Step 1: Introduction:
The Stripe Connector is an application which is embedded in Linnworks, developed and supported by eBusiness Guru Ltd.
The Stripe Connector can be used to take payments for Direct Orders in Linnworks. Customers can also check the status of their payments taken via Stripe.
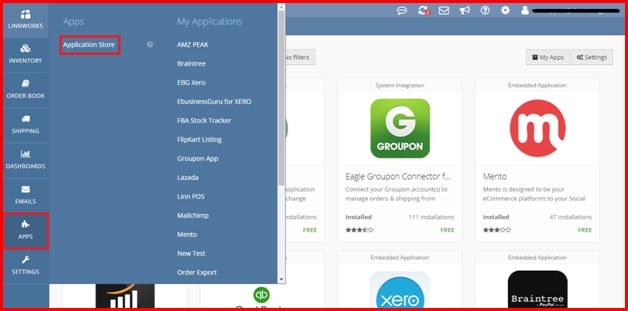
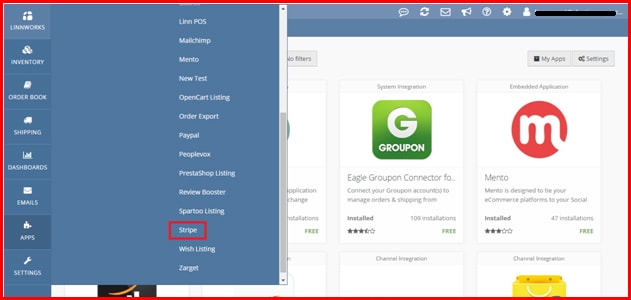
Step 2: How to install the App in Linnworks:
To use the Stripe Connector, it must first be installed within Linnworks.net
a) Log into Linnworks.net
b) Select Apps in the left-hand menu bar
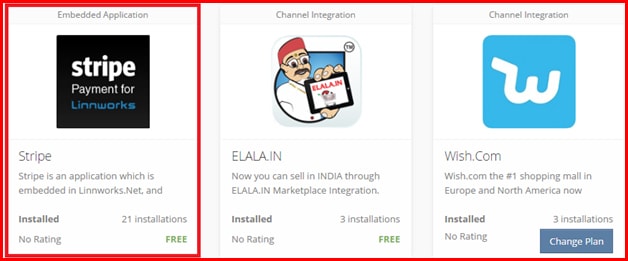
c) Select Application Store
d) Click on “Stripe Payment for Linnworks”
e) Click Install
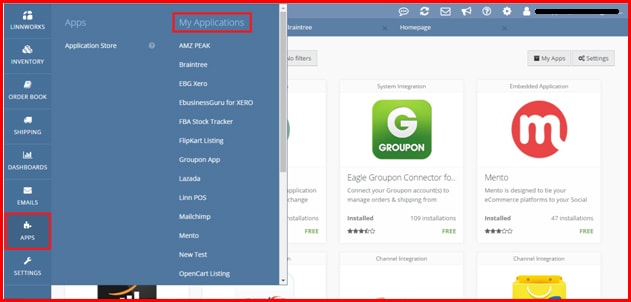
Step 3: How to open the Stripe App:
You must be logged into Linnworks.net.
In the left-hand menu, select Apps and My Applications. Click Stripe.
The first time you open the app, the Registration page will open.
Tick to show you have read the Terms and Conditions.
Click the Register Now button to proceed.
You will need to configure a Stripe account (Step 6)

Step 4: Home Screen:
The Home screen has the following option headings:
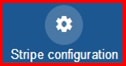
a) Stripe Configuration
b) Email Setting
c) Linnworks Direct Orders
d) Stripe Payment History
e) Purchase Credit
f) Invoice
g) Documentation
Step 5: Linnworks Direct Orders:
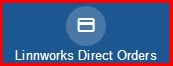
This is the default view when you open the App.
Here, you will find a list of Direct Orders with the payment status Not Paid in Linnworks Open Orders.
a) View Order :
Displays order contents.
b) Pay :
The Pay button allows you to take payment for a Linnworks Direct Order in the list.
This takes you to a confirmation page. Press the Pay with Card button to continue.

This takes you to the Payment screen, where you can enter the payment card details.

When correct card details are entered, the Pay button at the bottom will be activated, and show the amount to be paid.
Click Remember Me to save the payment card details for future transactions.
When the Pay button is clicked, payment is transferred to your Stripe account and you return to the Linnworks Direct Orders screen.
To take another payment, follow same process.
c) Send Stripe Invoice:

To send payment confirmation by email to the customer, go to the list of orders, and click Send Stripe Invoice button.
Step 6: Stripe Configuration:
You will be directed to the Stripe Page, where you will need to click on Sign In.

This will redirect you to the Stripe Sign In page.
If you have a Stripe account, enter your registered Email address and Password, before clicking the Sign in to your account button.
If you don’t yet have a Stripe account, then you will need to click on the Sign Up link below the credentials boxes.


After successfully logging in, you will be redirect to the Stripe Dashboard.
In the left hand panel, select the API option.
You are required to enter your Stripe account details again.

The next screen will show your account’s Secret Key and Public Key for Test and Live services.
Please take note of your Live keys for your Stripe Configuration in the App.
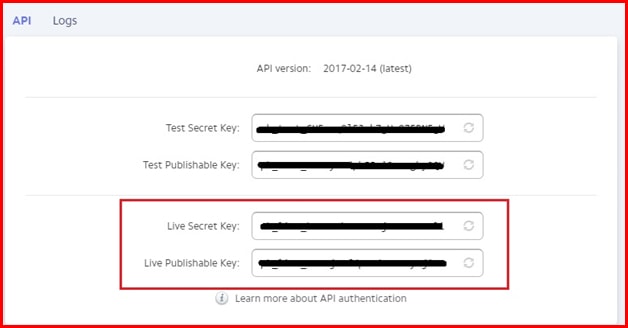
Enter the Keys as shown below, then click on Save.

Step 7: Email Setting:

In Email Setting you are offered two options:
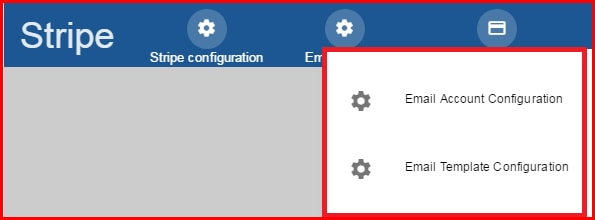
A) Email Account Configuration:
In the Email Account Configuration option, you can configure the email server configuration.

Enter your SMTP server address, the Port Number, and confirm if SSL Security and SMTP Authentication is required.
Enter the User Name and Password for the account and the From name that will be used when emails are sent from the account.
Reply To address specifies the address that will receive customer’s replies, if different to the address used to send.
Test your configuration and click Save.
B) Email Template Configuration:
The message body can be configured to reflect your branding.
Logo allows you to upload the logo you prefer to be displayed in your outgoing emails.
Subject Tag specifies an order field that can be used in the email subject. Click Add to insert it into the Email Subject field.
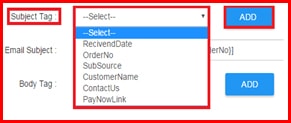
I. Email Subject: Mixes text and information from the order itself using Subject Tag to display a custom subject for each email.
II. Body Tag: Specifies an order field that can be used in the email body. Click Add to insert it into the Email Body.
III. Email Body: Starts with a predefined message. This can be customized with your own text, as well as with information from the order using Body Tags.
Remember to click Save to ensure your preferred settings are retained.

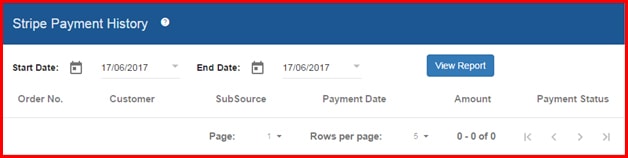
Step 8: Stripe Payment History:

This page displays a list of payments on your Stripe account.
To narrow down the period covered, or to change it, adjust the two dates at the top of the screen to specify the Start and End date.
Click View Report.
Step 9: Purchase Credit:

Payment confirmation SMS messages can be sent using credits. There are several subscription levels to choose, each corresponding to a different monthly credit balance.
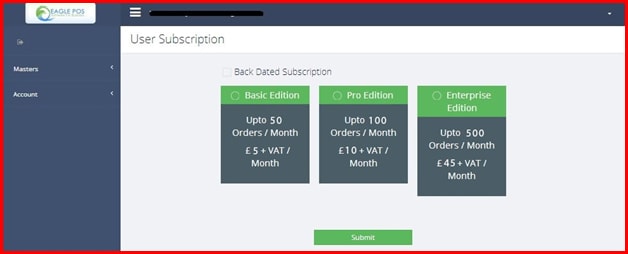
If you have run out of credits, or are just starting, you can click on the subscription you think you will need.
If you’re partway through the month and upgrade, your account will be credited with the difference between the the credits you have used this month and the new monthly allowance.
Click on the Submit button.
Step 10: Invoice:

