
Gati-KWE has been India’s leading shipping service since 1989.
Integrate Gati-Kwe’s Shipping services with Linnworks to print labels, create and submit manifests fast.
Gati Kwe linnworks offers
Our Gati-KWE Shipping Integration for Linnworks offers users:
Access to Gati-KWE shipping services within Linnworks
The ability to print Gati-KWE shipping labels from within Linnworks
The ability to create manifests for pinted shipping labels from within Linnworks
The ability to submit manifests to Gati-KWE from within Linnworks
Step 1: Integrate the Shipping Provider into Linnworks.net:
To use Gati, you must first install the integration from within Linnworks.net.
- Log into Linnworks.net
- Select Settings in the left-hand menu bar
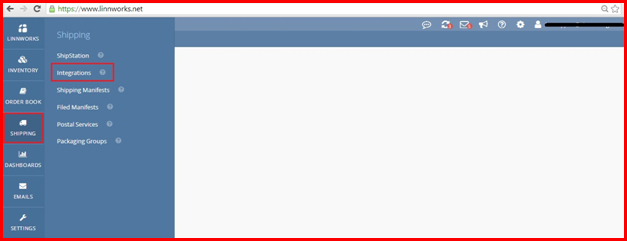
- Select Shipping.
- Click on Integrations.
- Select Add Integration.

- Locate Gati on the list of available Shipping Providers, and click Integrate.
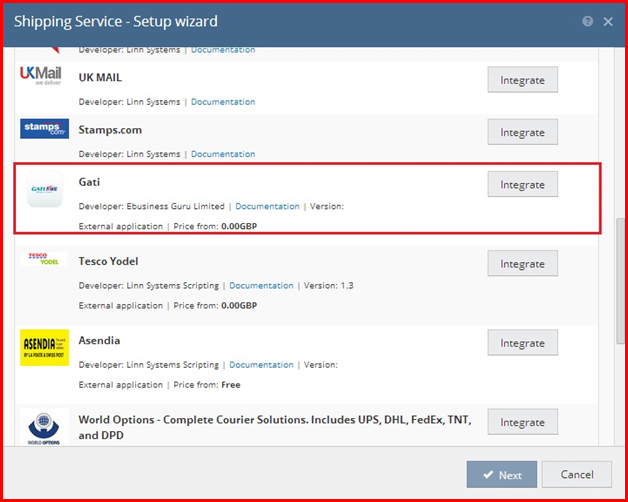
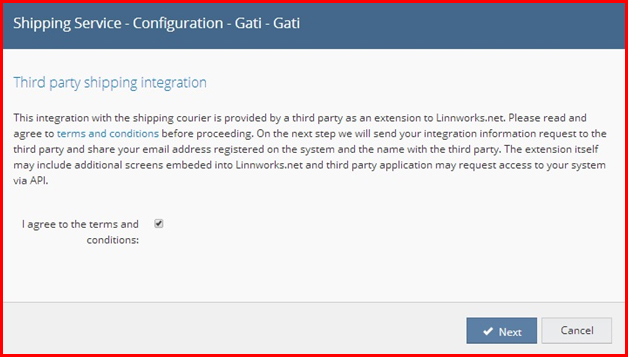
- The first thing you will see is a Third Party Integrations Disclaimer. Click on the link at the bottom to review the Gati integration Terms and Conditions.
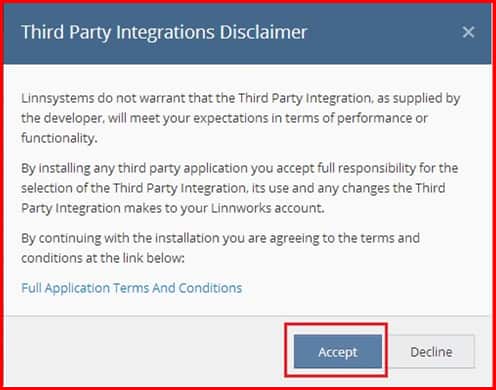
- Click Accept to continue.
- Enter an account name to start the integration process.
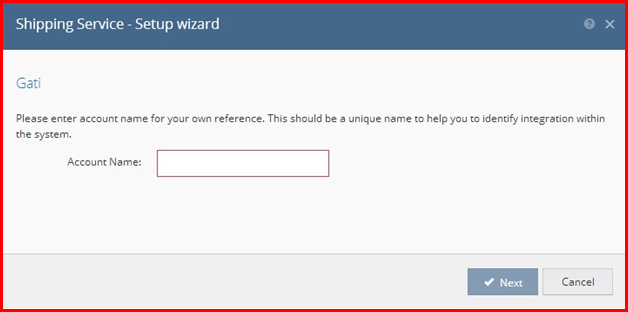
- Tick I agree to the terms and conditions to confirm you’re happy to proceed.
- Click Next to continue integrating Gati.
- Please enter information into the fields outlined in red in the screenshot below. This is the minimum information required for the Gati account’s registered user.
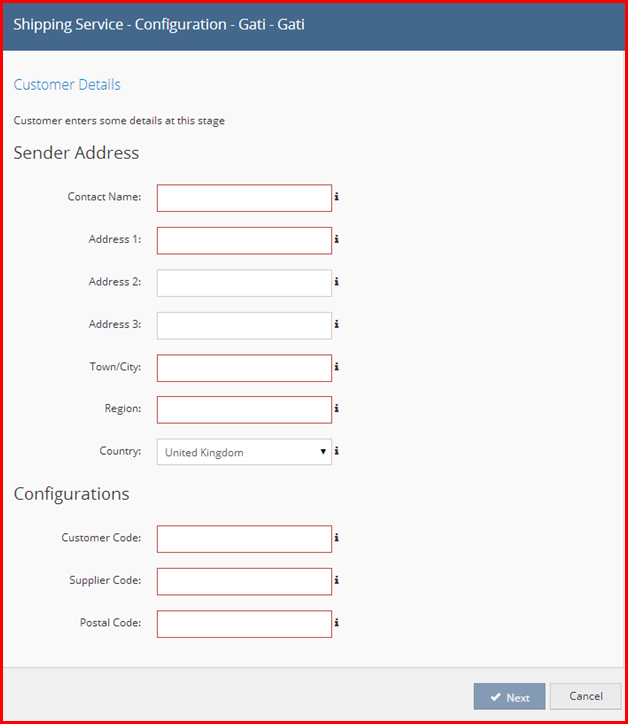
- Click Next to continue.
- To complete the integration, click Close.
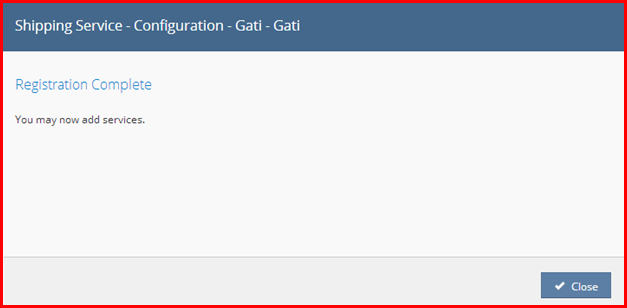
- Your Gati integration should now show under Shipping, and Integrations.
Step 2: Printer Config :

The next step is to configure the printer that will be used for your Shipping Labels.
- In Linnworks.net, select Shipping.
- Select Integrations.
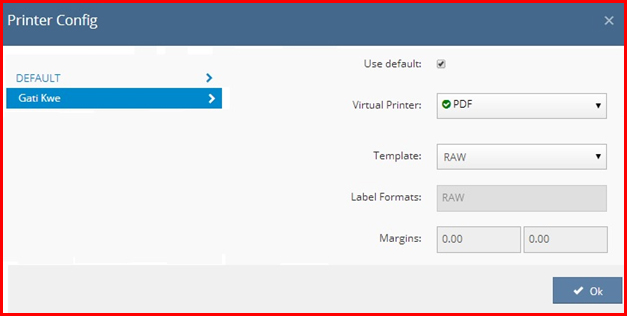
- Locate the Gati entry, and click the Printer Config button (as displayed above).
- Select the Default entry on the left (in blue in the Edit Printer Config window).
- Review the following settings:
- Use Default (Only shows for user account entries other than Default): Tick this option to use the settings from Default for this user account.
- Virtual Printer: Select a printer from those available through Virtual Printer to be used when printing Gati labels (Defaults to PDF).
- Template: Set a label template option – Available options may vary dependent upon the selected printer.
- Label Formats: Displays the formats supported by the selected Virtual Printer.
- Margins: Controls how much space in inches to leave as a margin on each label.
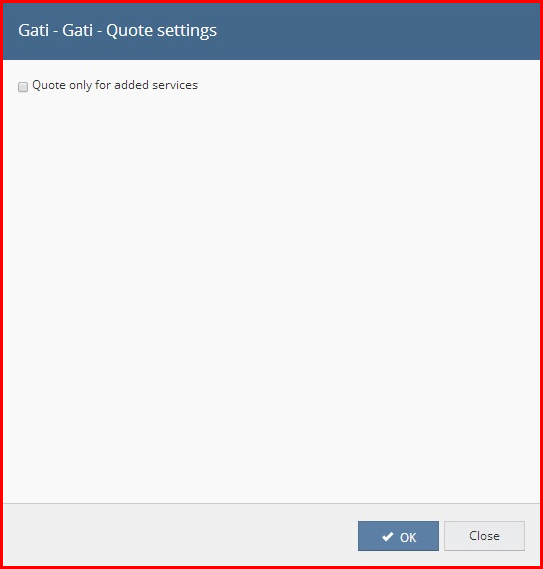
Step 3: Quote Settings :

- In Linnworks.net, select Shipping.
- Select Integrations.
- Locate the Gati entry, and click the Quote Settings button (as above).
- This opens the Edit Quote Settings window. The list will initially be blank.
- Tick the option Quote only for added services.
- Click OK at the bottom of the Quote Settings window to apply any changes.
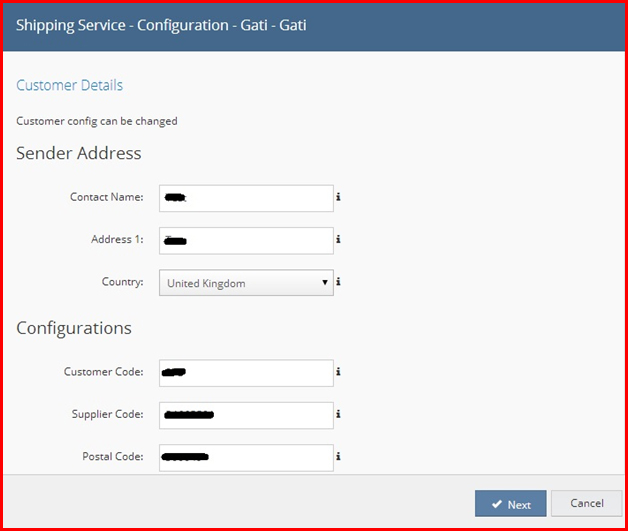
Step 4: Edit Config :

- In Linnworks.net, select Shipping.
- Select Integrations.
- Locate the Gati entry, and click the Edit Config button (as above).
- This opens the Edit Config window.
- Check and edit details related to Sender Address / Service Configuration options, then click Next.
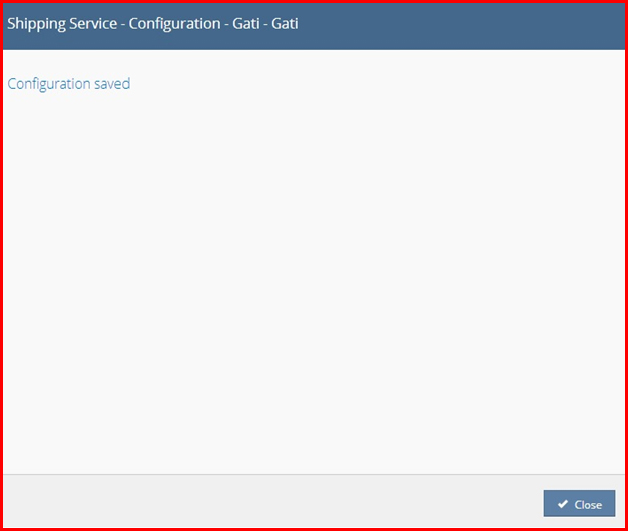
- You should receive confirmation of Configuration Saved.
Step 5: Services:

- In Linnworks.net, select Shipping.
- Select Integrations.
- Locate the Gati entry, and click the Services button (as above).
- This opens the Services window.
- Use the drop-down window in the top left-hand corner to see the shipping services available in your Gati account.
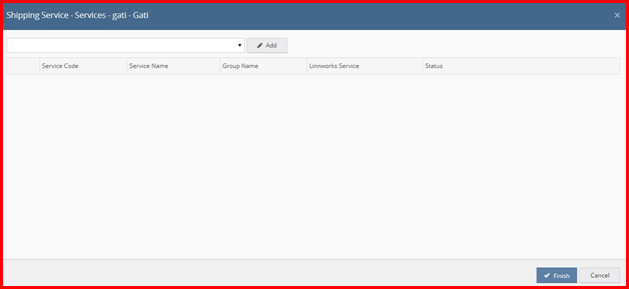
- Select one of these Services you want available to use within Linnworks. Click Add to move that service to the list.
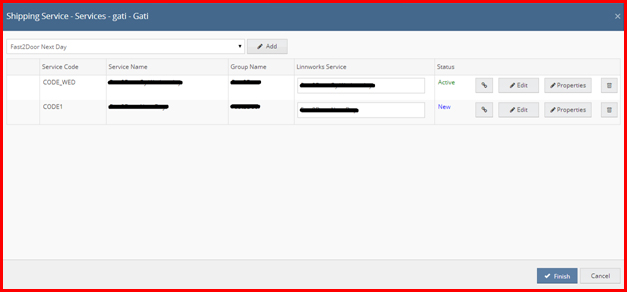
- You can edit the Service Name by clicking on it.
- The Option button
 allows you to Map the current service name to any existing shipping service.
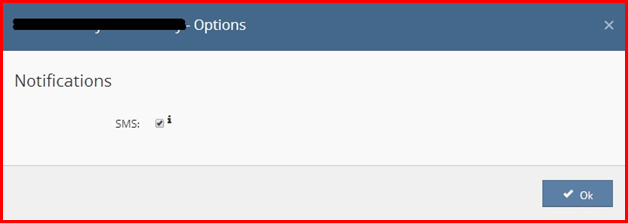
 - Click the Edit button
 to access the ability to send an SMS notification to customers.
- Click the Properties button
 , to open a new window. This displays available properties of the selected shipping service.

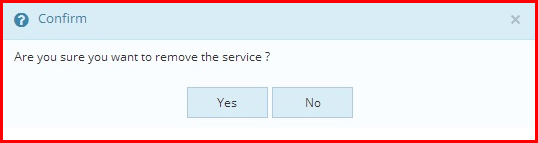
- Click the Delete button
 to remove a service. You’ll be asked to confirm your choice by clicking Yes or No.
Step 6: Delete Shipping Integration :

- In Linnworks.net, select Shipping.
- Select Integrations.
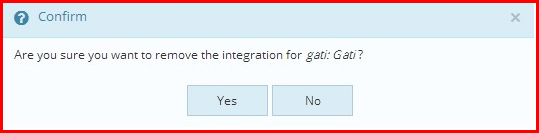
- Locate the Gati entry, and click the Delete button (as displayed above).
- This opens the Delete window.
- If you click Yes, it will allow you to remove the selected Gati Shipping integration from the list of Shipping integrations.
- If you click No, the selected Shipping integration remains part of the list of available Shipping Integrations.
Step 7: FAQs:
This shipping company provides services to India. For printing label for this shipping company, the following details are mandatory in this order:
Phone number should be defined in order
State (e.g. Gujarat) should be defined in order
Postal code (e.g. 380051) should be defined in order
Country (e.g. India) should be defined in order
Package details (e.g. Weight, Dimension) should be defined in order