
Manage nopCommerce orders, payments & shipping in Linnworks to streamline your business
nopCommerce has been recognised for over a decade as being significant in the eCommerce industry – even being recognised by Microsoft.
A free, open-source eCommerce solution, nopCommerce has an active community of users and developers, with over a thousand plug-ins and themes.
By integrating your nopCommerce setup with Linnworks, you can manage your orders, shipping and payments with ease.
£29.99 + VAT per month
The nopCommerce Connector is an application which is embedded in Linnworks, and developed and supported by eBusiness Guru Ltd.
- Log into Linnworks.net
- Select Settings in the left-hand menu bar
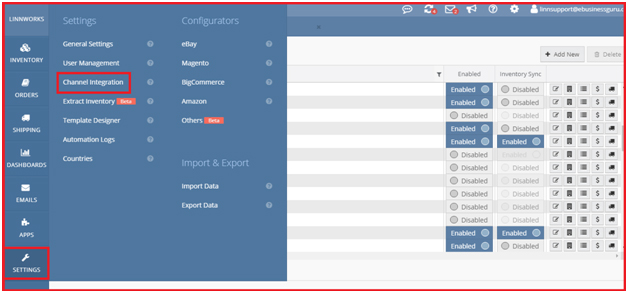
- Select Channel Integration.
- Select Add New to return a list of available Channel Integrations.

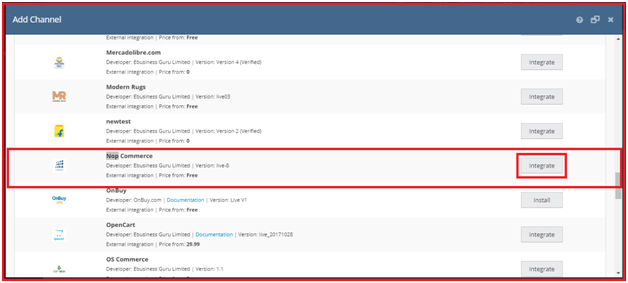
- Locate nopCommerce on the list, and click Integrate.
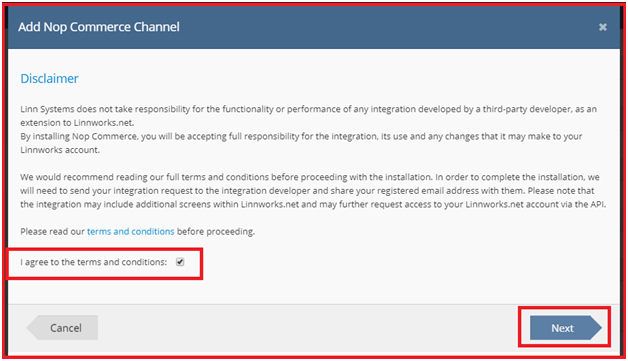
- After reading the warning, click Accept to move onto the next step of the integration. You can click on the link at the bottom to review the Terms and Conditions first.
- After reading the Disclaimer, please tick I agree to the terms and conditions and click Next to continue integrating nopCommerce.
- Complete the required details for nopCommerce as displayed below.
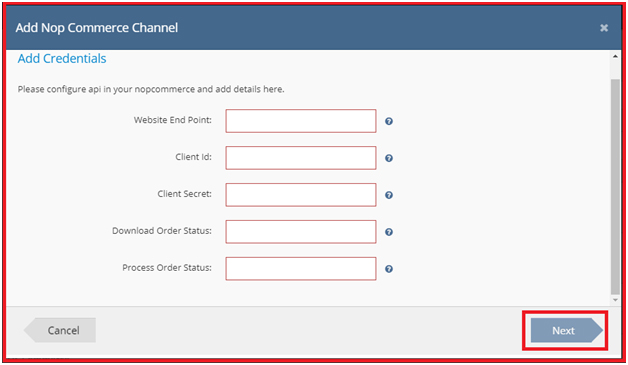
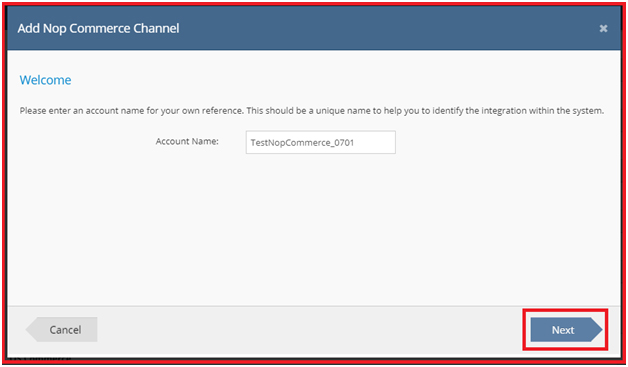
- Enter your nopCommerce account name to start the integration, then click Next.
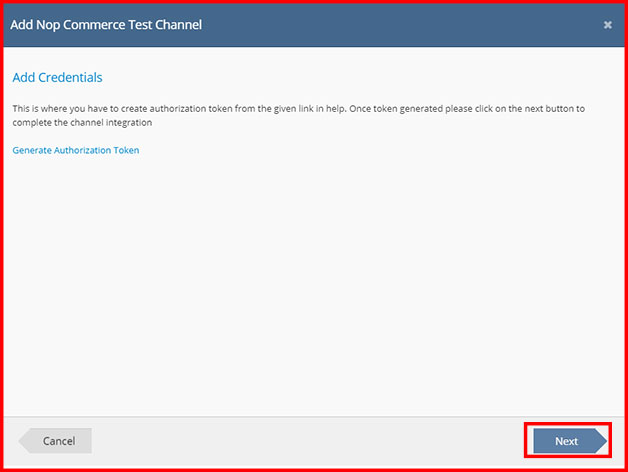
- Add your credentials. In the popup, open then copy and paste the authorization token.

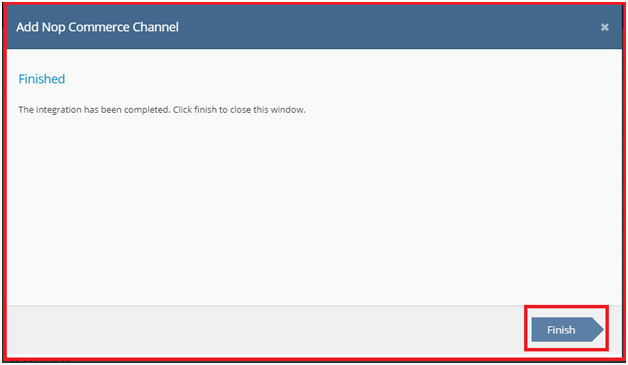
- To complete the integration, click on Finish. Your nopCommerce integration should now show in Linnworks.net under Channel Integrations.
- Open the nopcommerce admin panel.
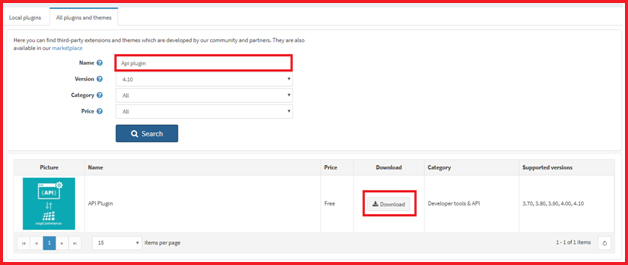
- Go to nopCommerce, then Configuration and Plugins. When the plugin page loads, click on All Plugins and Themes
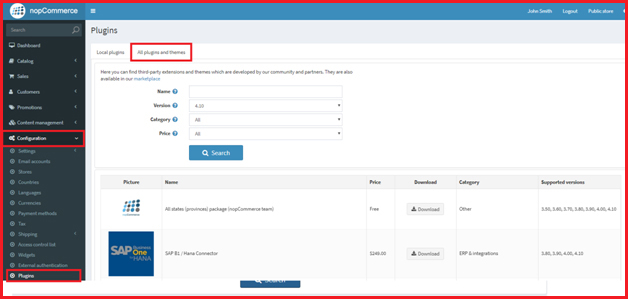
- Search for Api Plugin, then click Download.
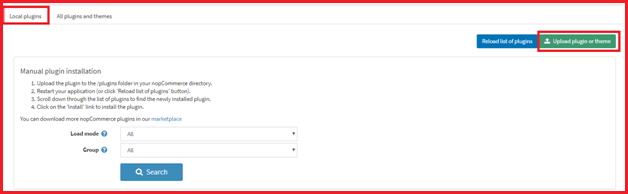
- After downloading the plugin, click on the Local Plugins tab, then click Upload plugin or theme.
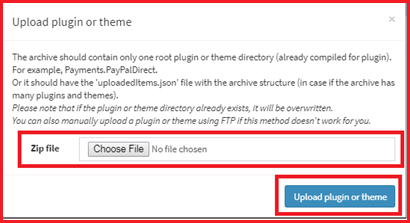
- You will be asked to select the ZIP file you downloaded in step 3. Select the files and click Upload plugin or theme.
Once the plugin has installed successfully, refresh the page.
- Now download file from https://avasam.s3.amazonaws.com/Plugins.zip and extract this file at your website root folder.
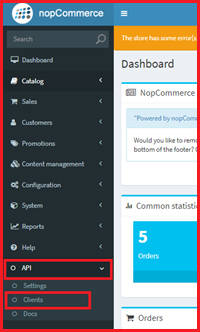
- Navigate to nopCommerce, then API and Clients to configure API details.
- Click Add New to configure the new client ID and client secret.
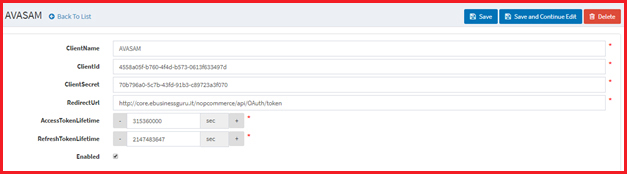
Always use Redirect URL as http://core.ebusinessguru.it/nopcommerce/api/OAuth/token
Mapping 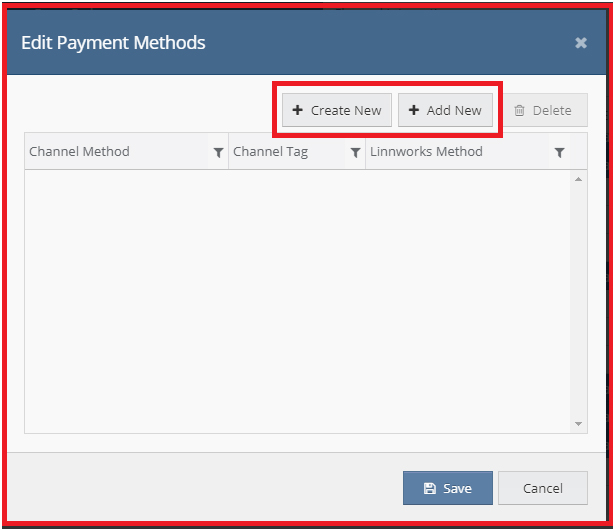
Linnworks uses the Mapping Tool to ensure that it knows which SKUs in its inventory are connected to which listings on nopCommerce. As such, you should ensure that all of your listings are mapped correctly, or stock levels and prices will not update correctly, and orders may not be picked accurately.
- In Linnworks.net, click Settings.
- Select Channel Integration.
- Locate the nopCommerce entry, and click the Mapping button. This screen is divided into two sections.
On the left are the listings Linnworks is aware of on your nopCommerce Channel. If this is not correct, or a change is missing, you should see the Download Listings button in the Listings section of the Channel Configuration. On the right is a Linnworks Inventory Search Tool. Each has its own Search box.
In the bottom left hand corner of the window is a status section. It shows the Total number of listings on the channel, and then beside it the Unlinked and Linked numbers – Linked listings are connected to a Linnworks Inventory item to allow updates and recognition, Unlinked are not. Ideally there should be no unlinked listings.
Linking Items Automatically
If the SKUs in your inventory match the SKUs used on the listings, Linnworks can link them all for you.
- Click the Settings button (in the top left hand corner with a cog/gear on it).
- Select Link All By.
- Select SKU.
- Linnworks will map all those listings that have a SKU which matches a SKU in the Linnworks Inventory.
- Check the Linked and Unlinked values once this is complete.
Linking Items Manually
If the SKUs in your inventory do not match the SKUs used on the listings, you can make the link manually.
- Use the left hand list and Search to find the listing to be linked.
- Click on it to highlight and select it.
- In the right hand list, use the Search box to find the correct Linnworks Inventory item to link it to.
- Click the Link button beside it with the listing highlighted.
- Repeat for other listings to be linked manually.
Creating Linnworks Inventory items and Mapping
If there are no SKUs in your inventory match to the SKUs on the listings, you can ask Linnworks to create basic Inventory items for you, and link them.
- Use the left hand list and Search to find the listing to be linked.
- Click on Create.
- A new item will be created in the Linnworks inventory using the Name, Price and Stock Level, as well as the SKU from the listing. This will be linked to the SKU.
- This can be updated with other information later in the Inventory.
- Repeat this for other Listings that have no Linnworks inventory equivalent.
Price Change Functionality
Price Change only works for listings that are correctly linked to a Linnworks Inventory item in the Mapping Tool.
- Open Linnworks.Net.
- Select Inventory.
- Select My Inventory.
- Use Search to locate the Inventory item that requires a Price Change on nopCommerce.
- Click on the SKU to edit the item.
- Click on the Listing descriptions tab.
- Under the Product pricing by Channel section, click on Add New.
- Enter the Source as nopCommerce.
- Enter the SubSource as the name of the nopCommerce channel.
- Enter the Price.
- Click on + Add to complete.
- If there is already an entry present for the correct Source and SubSource, double click the Price to edit it, and then click Enter.
- Close the SKU window when you have finished.
Shipping Mapping:
Open the Channel Integration screen. Locate the NopCommerce integrated channel, then click the last icon for Shipping Mapping.

You will see the popup as below for adding, editing and deleting shipping mapping.
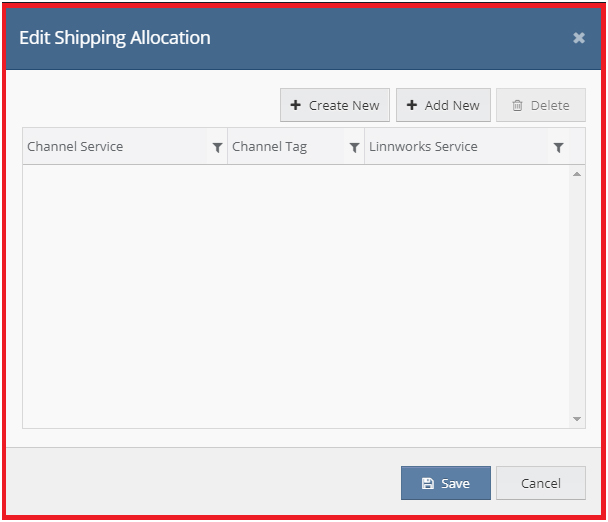
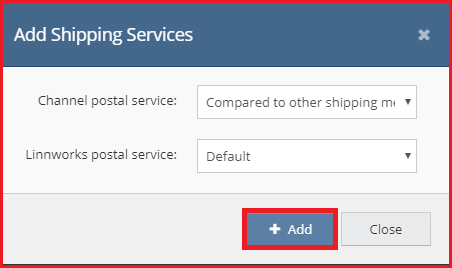
Create New Shipping Service Mapping
- Click on Add New to add new shipping mapping
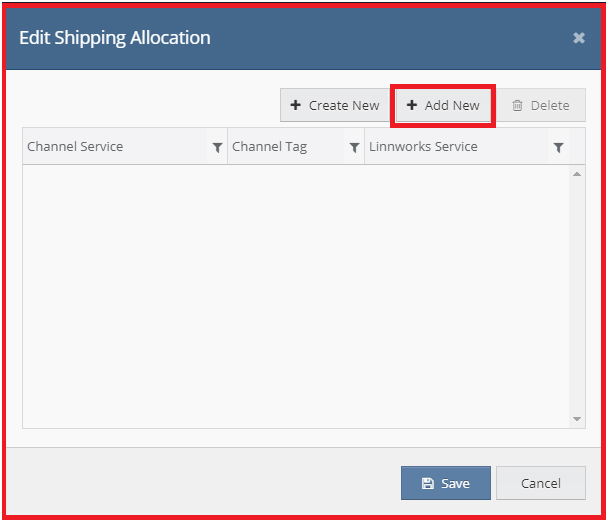
- Select the channel postal service and Linnworks postal service you wish to use.
- After you have selected the channel postal service and Linnworks postal service, click Add to add the new shipping service mapping.
Delete Shipping Mapping:
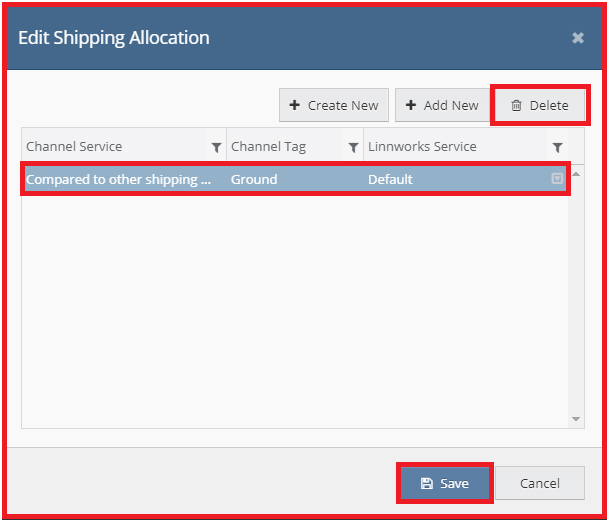
- Select the shipping service you wish to delete, then click on Delete.
- Once shipping service mapping has deleted click Save to complete the deletion.
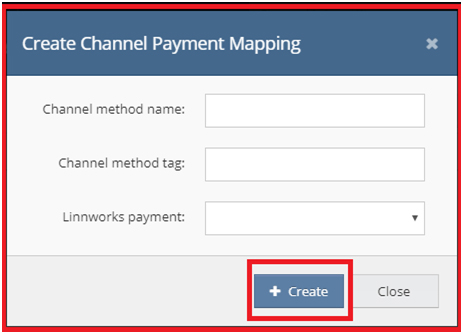
Click on the payment mapping icon  to open the payment mapping screen.
- Edit the Payment Methods screen as displayed below:

- Create a new payment screen as displayed below:
- Add new payment screen will be displayed as below:
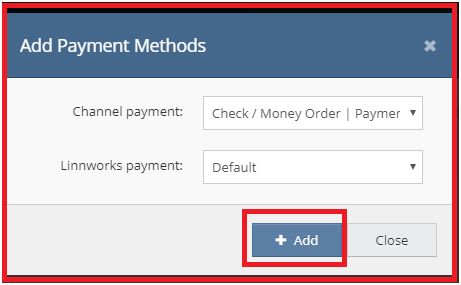
Delete Payment Mapping:
- Select the payment service you wish to delete, then click on Delete.
- Once payment service mapping is deleted, click Save.