Step 1: SHOPLINE Rules & Guidelines
Order download without Item’s SKU
- If the ordered item has a Product ID but it does not have a SKU, the order will be downloaded, and the SKU field on the order item will be populated with the Product ID.
Order cancellation and refund
- SHOPLINE Unpaid orders can not be partially canceled.
- Whenever any order gets canceled (I.e. SHOPLINE Paid order (Partial/Full)), it create a refund of the respective order automatically.
Download SHOPLINE products in channel mapping screen
- It’s mandatory to define unique SKUs of the products within a single SHOPLINE account.
- SHOPLINE’s inventory settings must be enabled to Tracking quantity of the product. It is required to automatically reflect (Sync) stock level changes made in Linnworks items to SHOPLINE. Follow this guide to see how to enable inventory tracking.
Step 2: Integrate the channel into Linnworks.net
To use SHOPLINE channel, it must be installed within Linnworks.net from the application store.
- Login to Linnworks.net
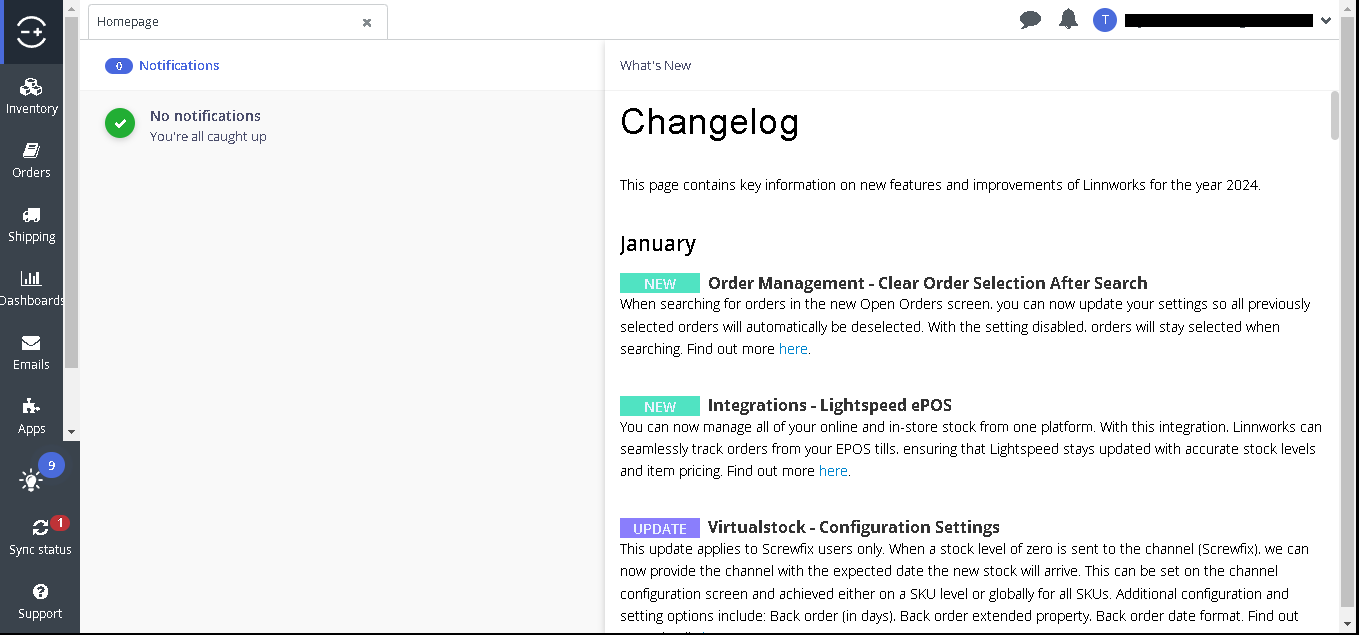
- Select settings in the left-hand menu bar, and then click on the channel integration option
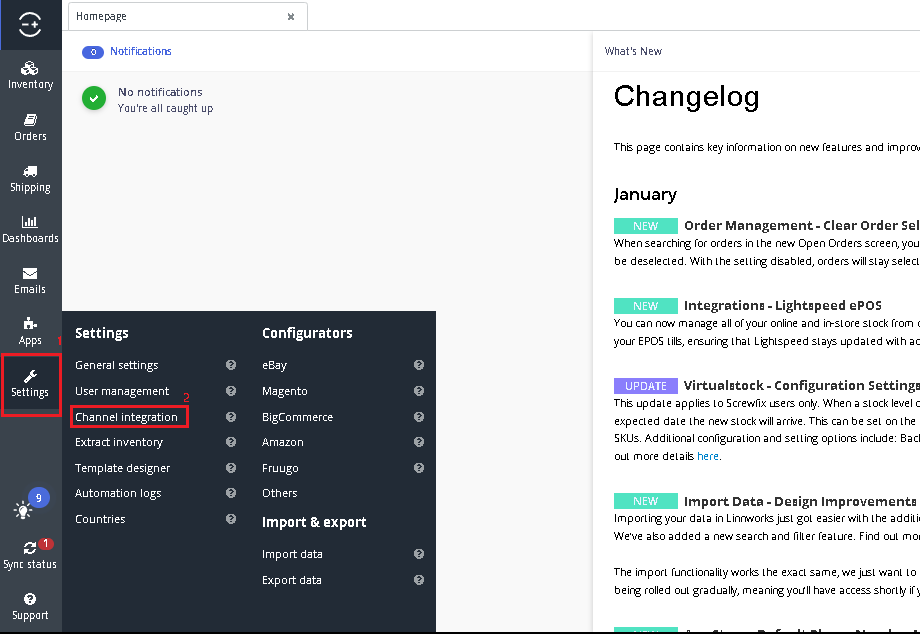
- After the selection of the channel integration option, below screen will be displayed:
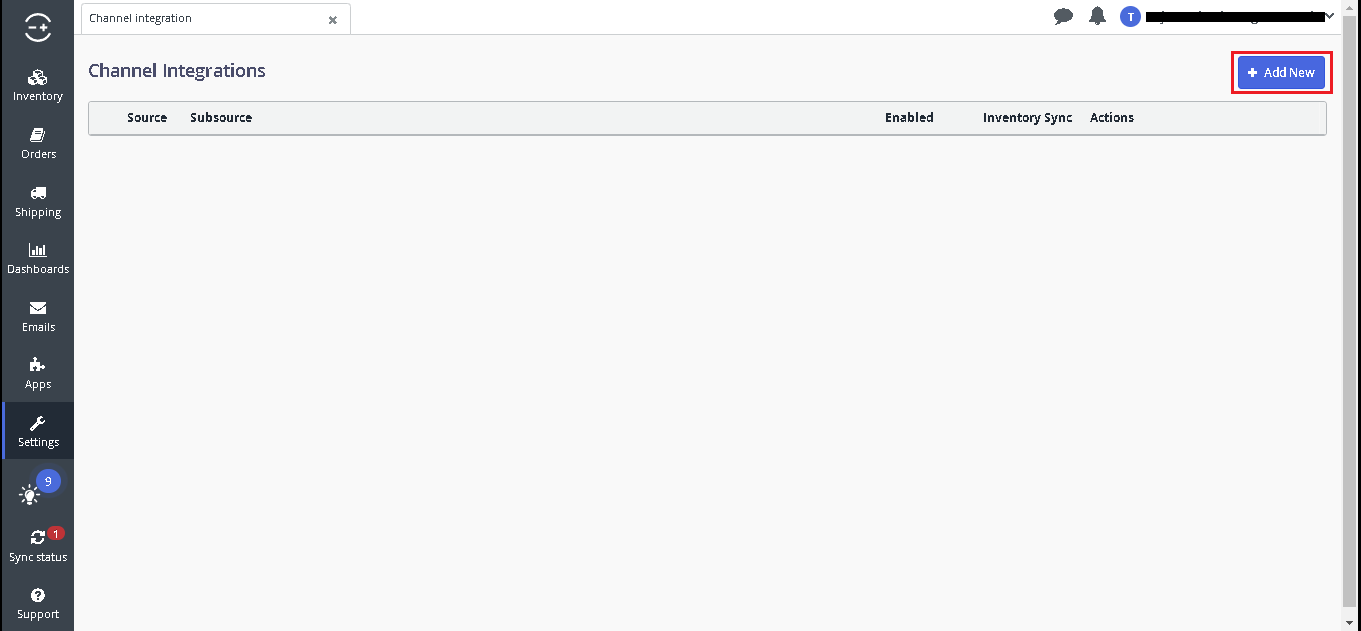
By clicking on the “Add New”  button, SHOPLINE channel can be added.
- By clicking on “Add New”, it will display list of the available sales channel.
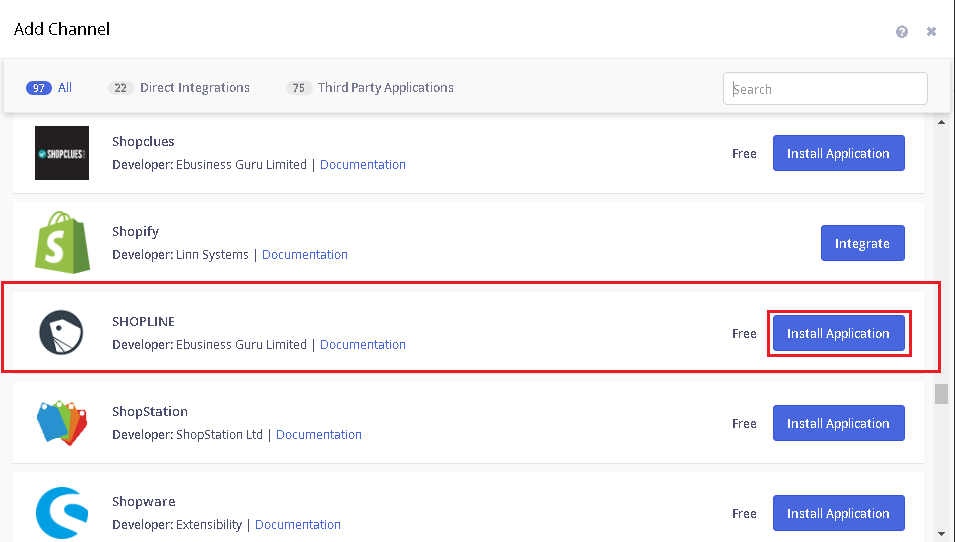
- Search SHOPLINE on the list, and click on “Install Application” button.
By clicking on  button, the SHOPLINE channel could be integrated. Follow the integration wizard to complete the integration.
- Enter the account name to integrate with the SHOPLINE account.
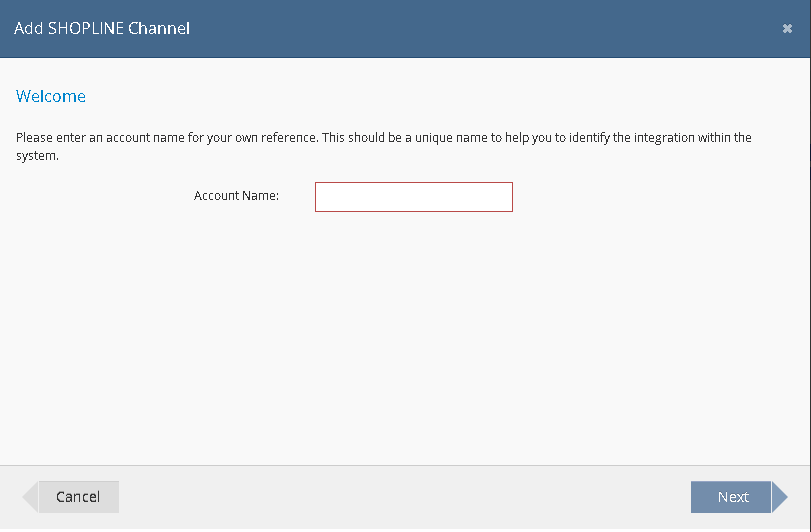
In this step, provide an account name for the SHOPLINE channel and then click on the “Next” Button.
- Read disclaimer and accept the the terms and conditions.
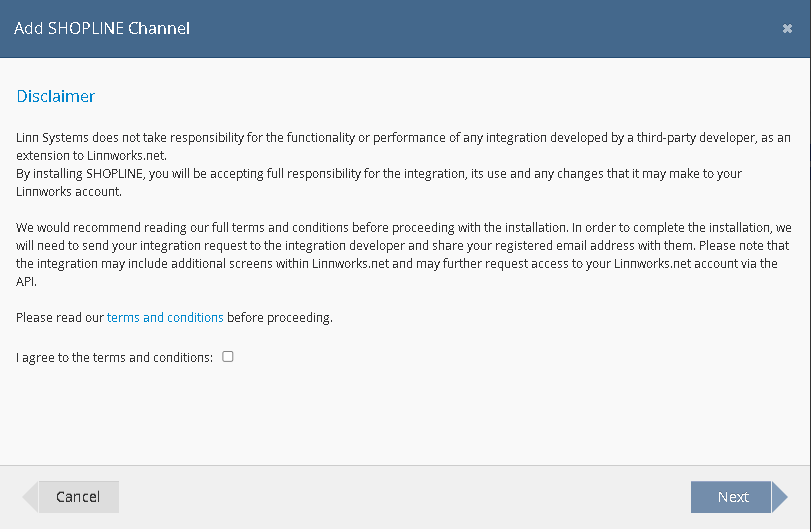
After reading the disclaimer and terms and condition, please tick ‘I agree to the terms and conditions’ and click on the “Next” button to continue integration wizard.
- Fill the Site (Shop) details for SHOPLINE channel.
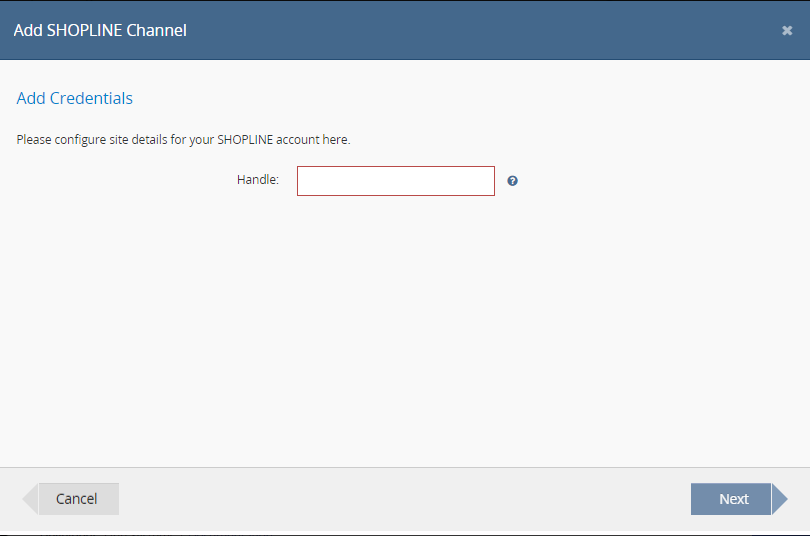
To integrate the SHOPLINE store, enter the store handle in the text box.
Note:-Store handle is the Store’s unique identifier or store domain prefix.
For example, the handle of https://zhangsan.myshopline.comzhangsan Click on the “Next” button to move to the next steps of the integration wizard.
- Generate authorization token.
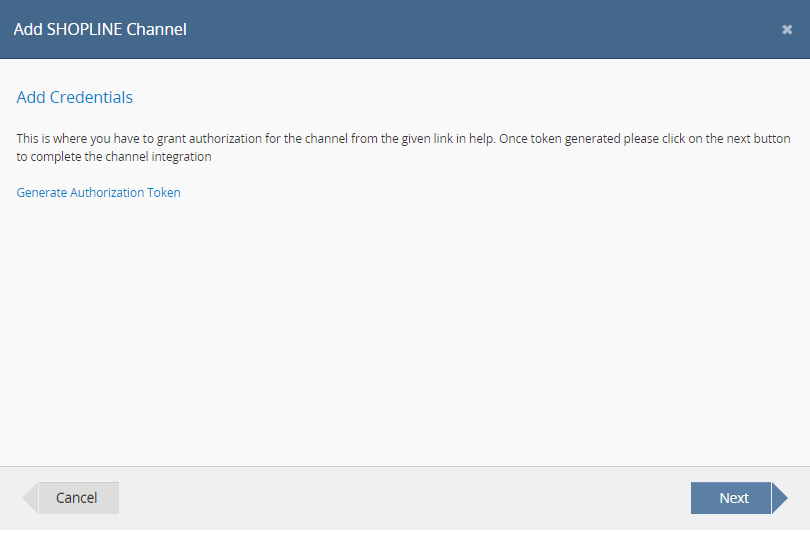
In this Step, It is compulsory to authorize the channel within Linnworks by clicking on the “Generate Authorization Token”.
By clicking on the link it will redirect to the SHOPLINE store login screen, where the credentials needs to be entered and follow the instruction to grant the access for the “eBG Linnworks Connector” application.
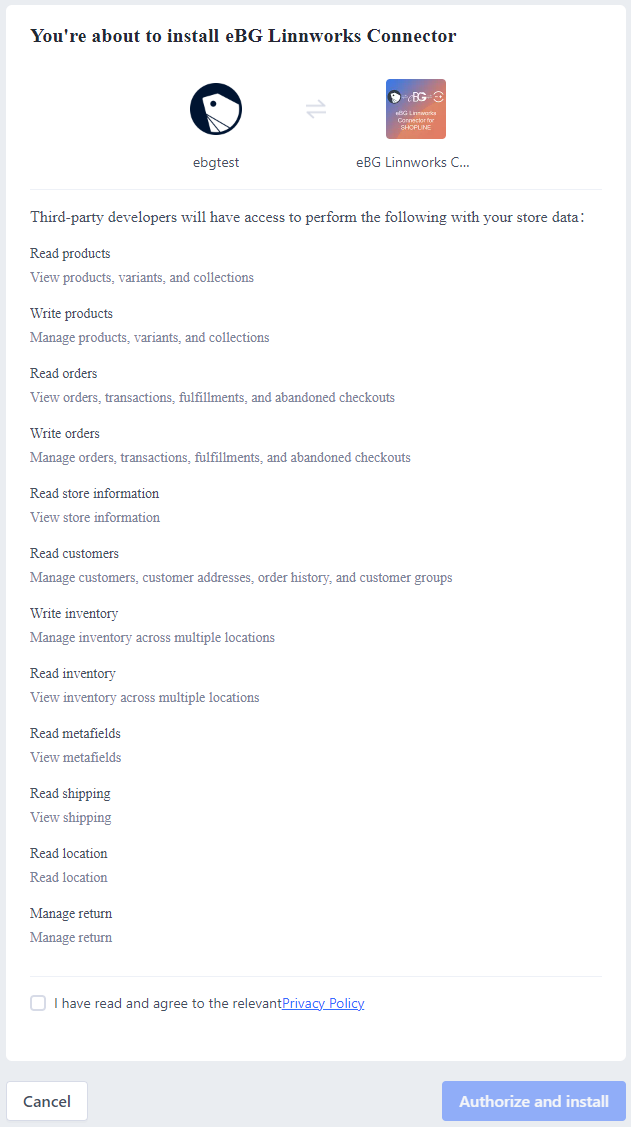
Once login into the SHOPLINE store, above screen will be displayed to verify app store operation’s and refer the SHOPLINE privacy policy, then tick the checkbox (Privacy Policy) and click on the “Authorize and install” button. Once the application is successfully authorized, it will be redirected to the following page.
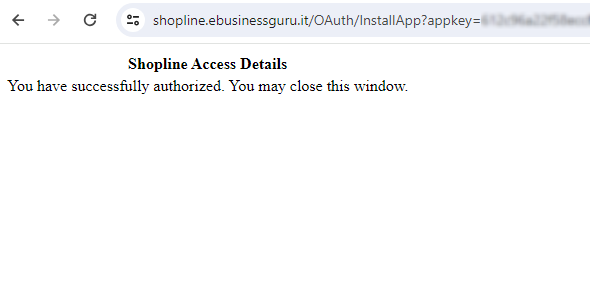
This screen shows that the authorization process has been completed successfully and this tab/window can be closed.
Click on the “Next” button to move to the further steps of the integration wizard.
Note:– Before moving on to the next step, make sure the authorization procedure is finished.
- Configure store details.

Inventory Location: Select the SHOPLINE store location present on SHOPLINE for Inventory sync.
Send Notification to Customer: Whether the customer should be notified or not.
If set to true, then an email will be sent to the customer from the SHOPLINE store when the order processed from Linnworks.
Click on the “Next” button to move at the last step of the integration wizard.
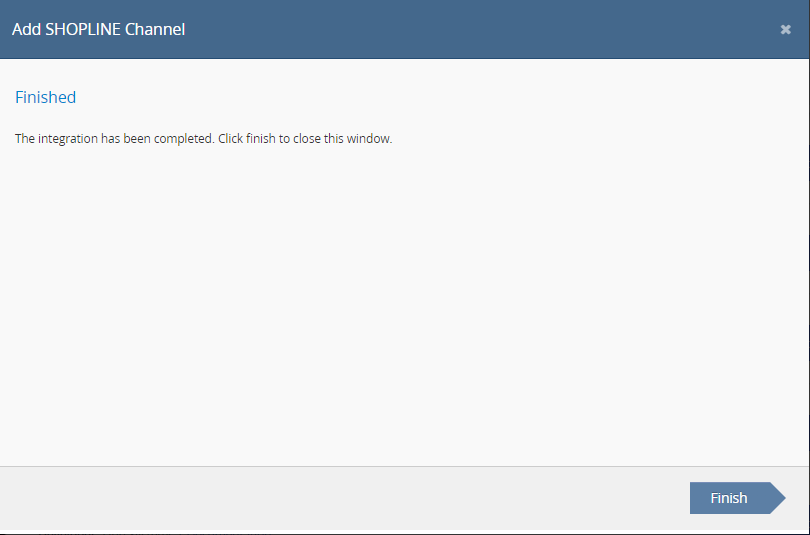
SHOPLINE channel integration wizard completed. Click on the Finish Button to close the wizard.
Once the integration process is completed, the SHOPLINE channel will be displayed on the channel integration screen of Linnworks.net
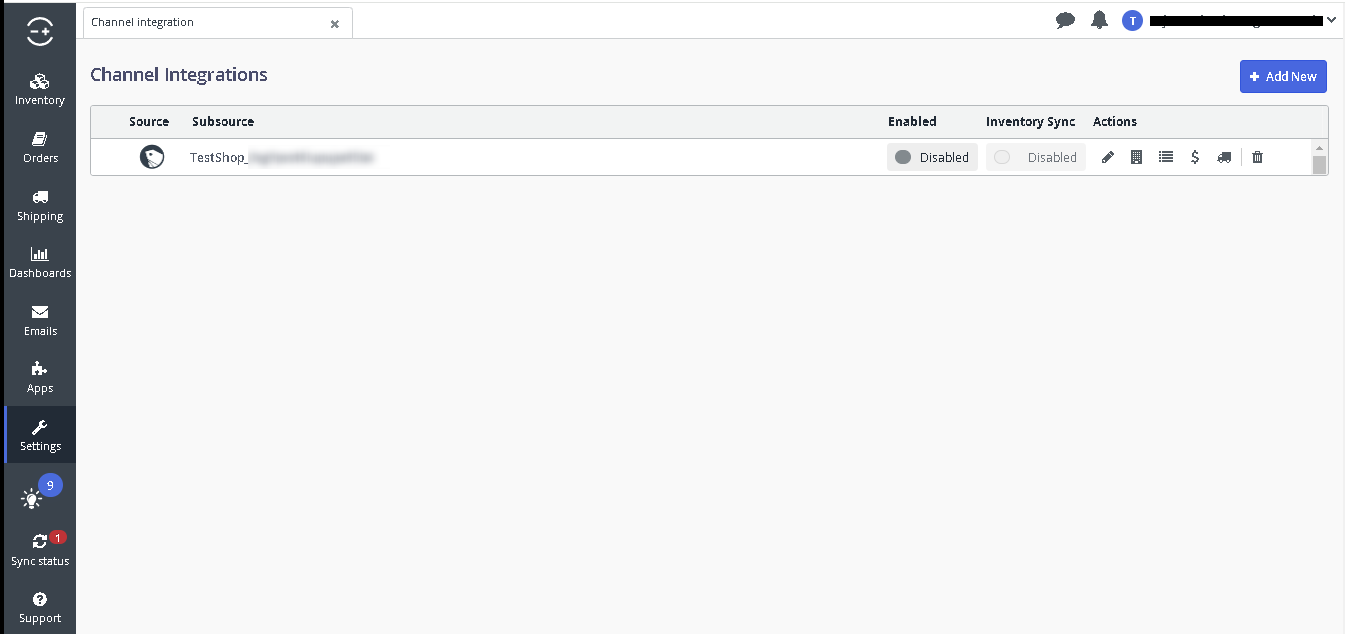
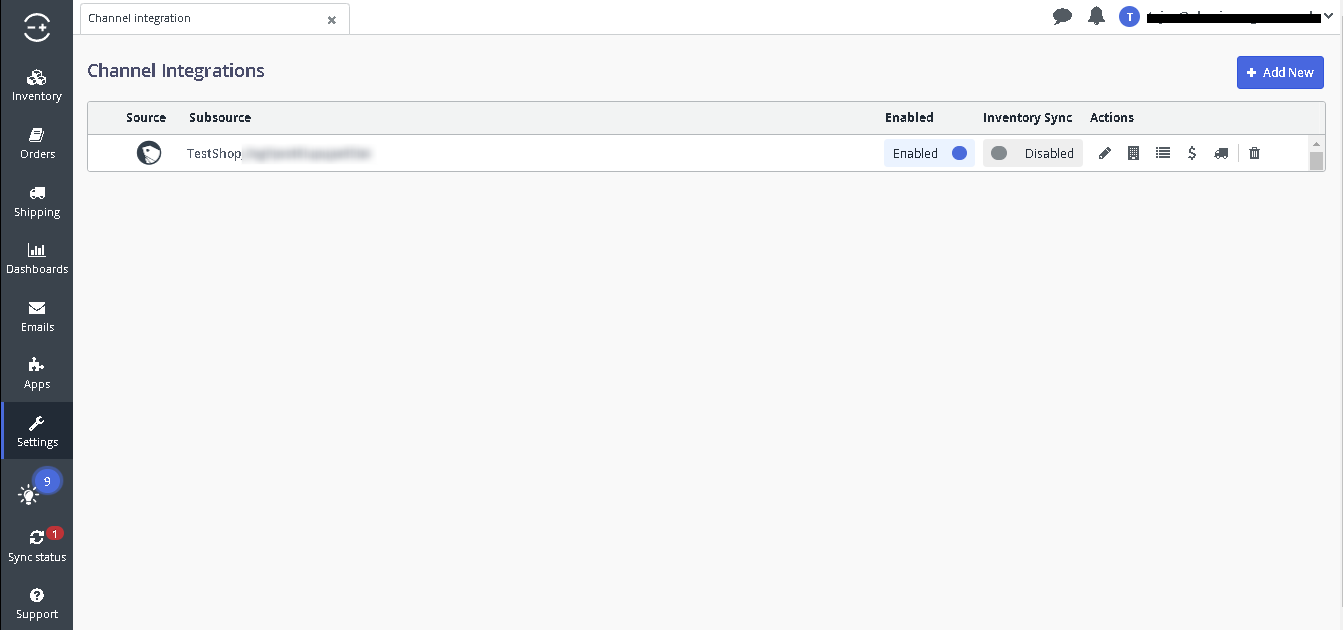
Step 3: Enable the channel integration
By the clicking on the  toggle button, the channel can be enabled. After enabling the channel, screen will be display as below:
Step 4: Edit Channel Details
By the clicking on the  icon you can update configuration of account, order, inventory, inventory – price change, listings, and channel specific configuration.

- Account
To Enable or Disable the account, go to the Account section. If the Enabled option is unticked, Linnworks will not download or update any orders or submit inventory-level updates from Linnworks to the SHOPLINE Channel.
The Test button allows you to confirm there are no errors preventing Linnworks and SHOPLINE communicating each other. Contact “eBusinessGuru” Support if Test Reports shows any errors.
Click Save at the bottom of this window to apply any changes.
- Order
- In the Order section, there are two options.
Dispatch Notes when enabled, allows Linnworks to send information about orders that have been Processed in Linnworks. Orders that are Processed in Linnworks are updated to the status on SHOPLINE with tracking information.
The Order Sync Date reflects the date and time of the last successful order download.
Click Save at the bottom of this window to apply any changes.
- Inventory
In the Inventory section, the first checkbox is Update Inventory. It is used to enable or disable inventory updates to the channel. When enabled, Linnworks will submit inventory updates to the SHOPLINE channel when the available stock level in Linnworks changes. When disabled, Linnworks will not send any stock updates to the SHOPLINE channel.
Update Inventory only works where a listing has been Mapped to a Linnworks Inventory item. See the “Channel Mapping” section of this document for more information.
Max Listed allows you to filter the highest quantity that Linnworks will send to the listings on SHOPLINE. If Max Listed is set to 50, and Available Stock moves from 30 to 60, Linnworks will only send 50, and this will not change until the Available Stock level drops below 50.
Stock Percentage acts in a similar fashion, but only updates the listings with the specified percentage of your actual Available Stock level.
End When enables to force a listing to end or show out of stock when the submitted stock level value reaches a specified amount. When End When value is reached or passed, 0 is submitted to the channel. End When the value must always be lower than the maximum listed value. Once it reached to the mentioned amount, the product gets Out of stock on the channel.
Click Save at the bottom of this window to apply any changes.
- Inventory – Price Change
The Price Change feature allows Linnworks to send new prices directly to the listing when they are correctly imported or updated.
Note:– Price Change only works where a listing has been Mapped to a Linnworks Inventory item.
- Listings
In the Listings section, the information reflects the information Linnworks currently has about listed items on the SHOPLINE marketplace.
If there is a tick by Listing Download in Progress, Linnworks is downloading the current listings, and cannot be interrupted.
The Listing Download Start Time value is the time the last download/update was started.
The Last Listing Download Completion Time value tells the last successful download completed and was imported into Linnworks.
The Listing Download Estimated Completion reflects Linnworks’ best estimate of when the most recent or current download should be completed. The Download Listings button instructs Linnworks to retrieve the latest listing information, and ticks the Listing Download in Progress box. This can only be used once every 2 hours maximum and will warn you if you try to use it more frequently.
Click Save at the bottom of this window to apply any changes.
- Channel Specific Setting
These settings are used to enable Linnworks and SHOPLINE account to connect, and are covered in Step 1.
Click Save at the bottom of this window to apply any changes.
Step 5: Location Mapping
By the clicking on the  icon you can update configuration.
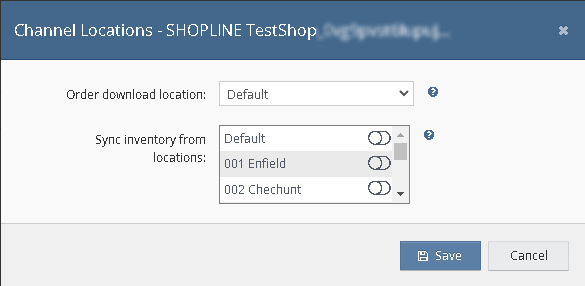
The first option is the Order Download location This is initially Default, but can be changed. Click on the drop-down list and select which location will initially receive the orders from the SHOPLINE integration.
Under Inventory Sync Locations it control which Linnworks Inventory locations are used to calculate the Available Stock values for the SHOPLINE listings.
If you have only the Default location, this can be ignored, with Default left enabled.
If you have multiple Inventory Locations, you can switch off locations (slide the switch to the left) that you don’t want to be included in the stock numbers on the listings.
You should also click Save at the bottom of the configuration window to apply any changes.
Step 6: Channel Mapping
By the clicking on the  icon you can open Channel mapping screen.
This screen is divided into two sections.
On the left is the listing Linnworks is aware of on your SHOPLINE Channel. If this is not correct, or a change is missing, you should see the Download Listings button in the Listings section of the Channel Configuration.
On the right is a Linnworks Inventory Search Tool.
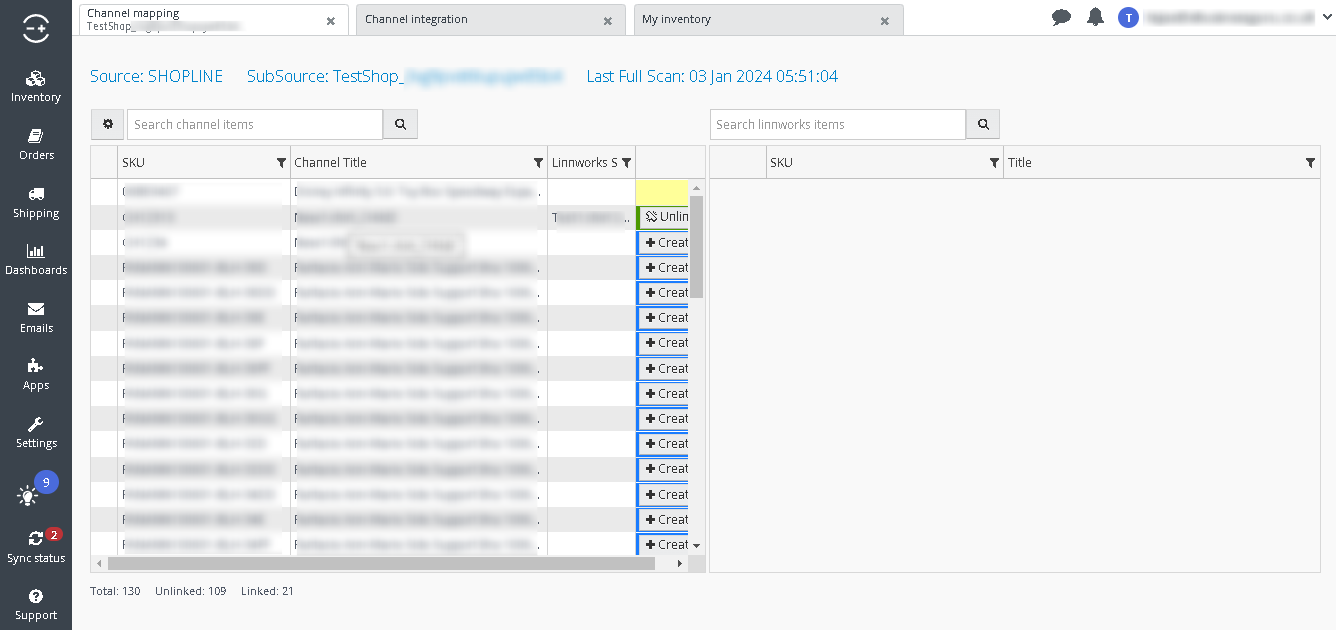
Note:– SKU should be there for all the items from SHOPLINE so that it can appear in the Channel Mapping screen in Linnworks.
- Linking Items Automatically:
If the SKUs in your inventory match the SKUs used on the listings, Linnworks can link them all for you.
- Click the Settingsbutton (in the top left hand corner with a cog/gear on it).
- Select Link All By.
- Select SKU.
- Linnworks will map all those listings that have a SKU which matches a SKU in the Linnworks Inventory.
Check the Linked and Unlinked values once this is complete.
- Linking Items Manually:
If the SKUs in your inventory do not match the SKUs used on the listings, you can make the link manually. To manually map your listing:
- Search for the listing you want to map using the search box at the top left.
- Select the listing by clicking on the row.
- Search for a Linnworks stock item using the search box at the top right.
- Click the “Link” Button.
Repeat for other listings to be linked manually.
- Creating Linnworks Inventory items and Mapping:
If Linnworks does not find an SKU in inventory that matches the Channel SKU,you can ask Linnworks to create basic Inventory items for you, and link them.
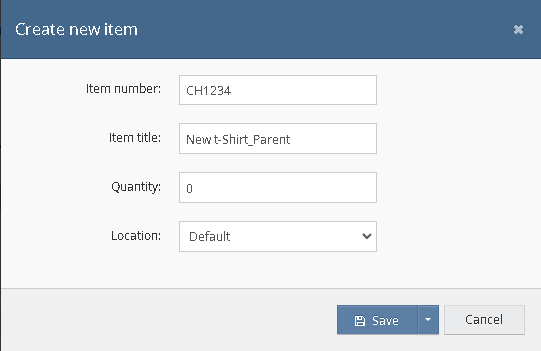
To create a Linnworks product from a channel listing:
- Click on the
 Button.
 - The Create new item pop-up window will open and is pre-populated with data taken from the channel listing and can be customized whether required.
- Click on the “Save” button to create an item and link the channel SKU.
Step 7: Payment Mapping
Click on the  icon to map the Payment methods.
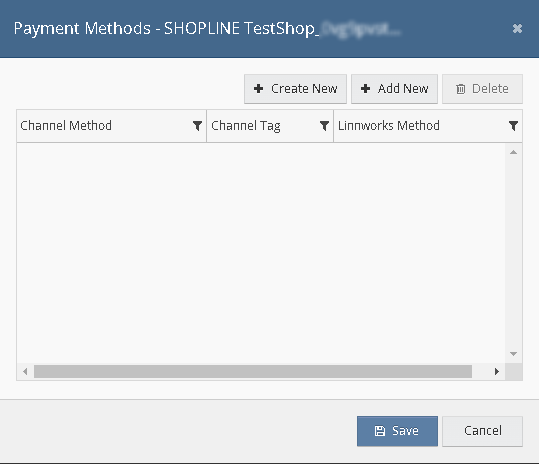
To add a new payment mapping, click the “Add New” button and choose a channel payment method, followed by the Linnworks payment method.

Click on the “Add” Button to add the mapping in a list.
If Linnworks can’t retrieve a list of available payment methods from the channel, then they need to be created manually. If any difficulty to finding the correct channel payment method name or tag, you can check the XML of an order downloaded from that channel.
To create new payment method, click on the “Create New” button.
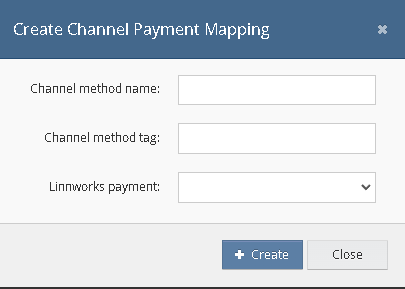
Click on an “Create” button to add a mapping in a list.
Finally click on the “Save” button to save all the mapping.
Step 8: Shipping Mapping
Click on the  icon to map shipping methods.
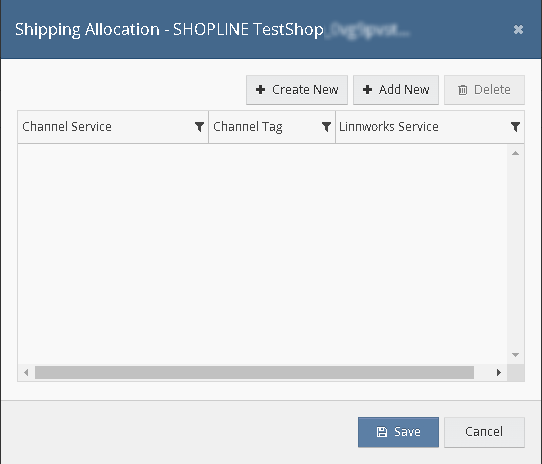
To add a new shipping mapping rule click on a “Add New” button and choose a channel shipping service, followed by the Linnworks shipping service that needs to map.
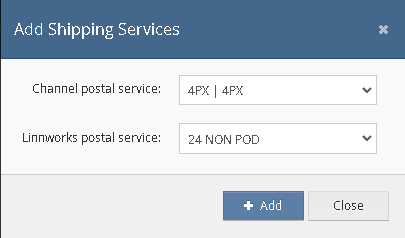
Click on the “Add” Button to add the mapping in a list.
If Linnworks cannot retrieve a list of available shipping services from the channel, they must be created manually. If any difficulty in finding the correct channel shipping service name or tag, check the XML of an order downloaded from that channel.
To do so, need to follow below steps:
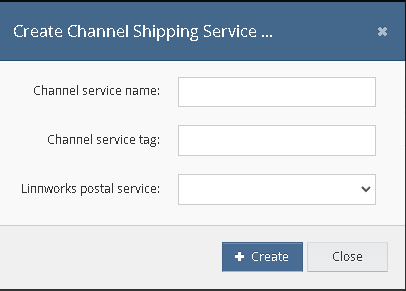
- Click on the “Create New”
- Specify the channel service name.
- Add a tag into the appropriate field.
- Select Linnworks postal service.
- Click on a “Create” button.
Finally click on the “Save” button to save all the mapping.
Step 9: Listing Creation
New listings on the SHOPLINE can be created via Linnworks.
- Creating a SHOPLINE configurator
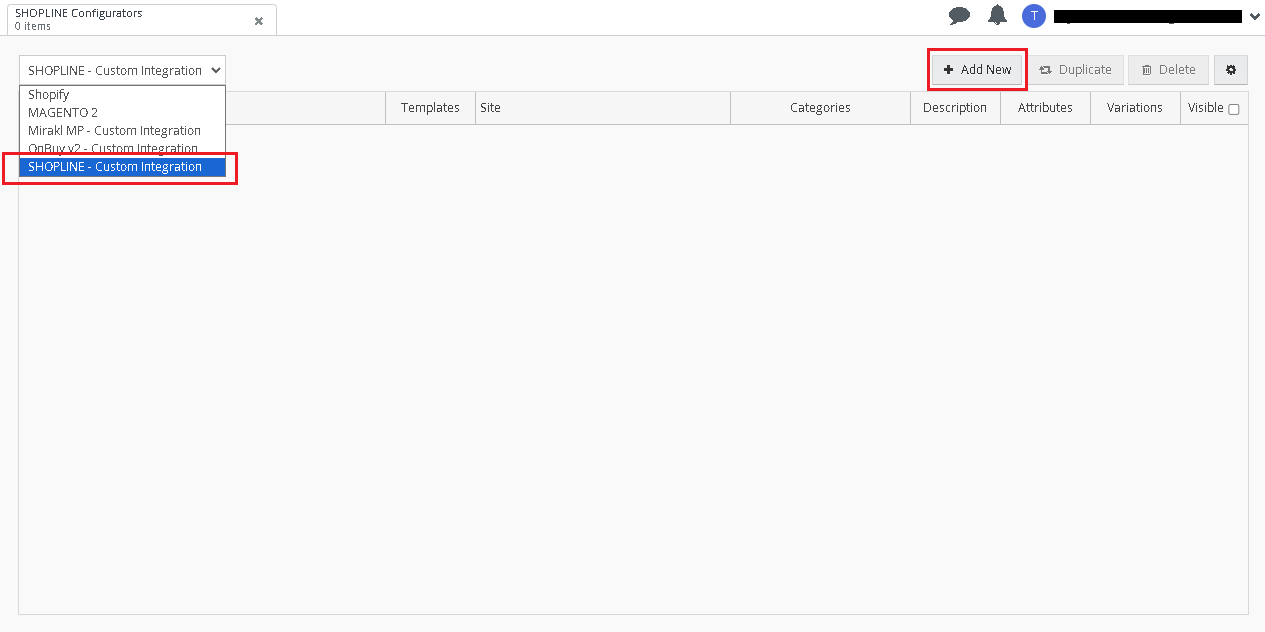
To create a SHOPLINE configurator, Go to Setting > Others.
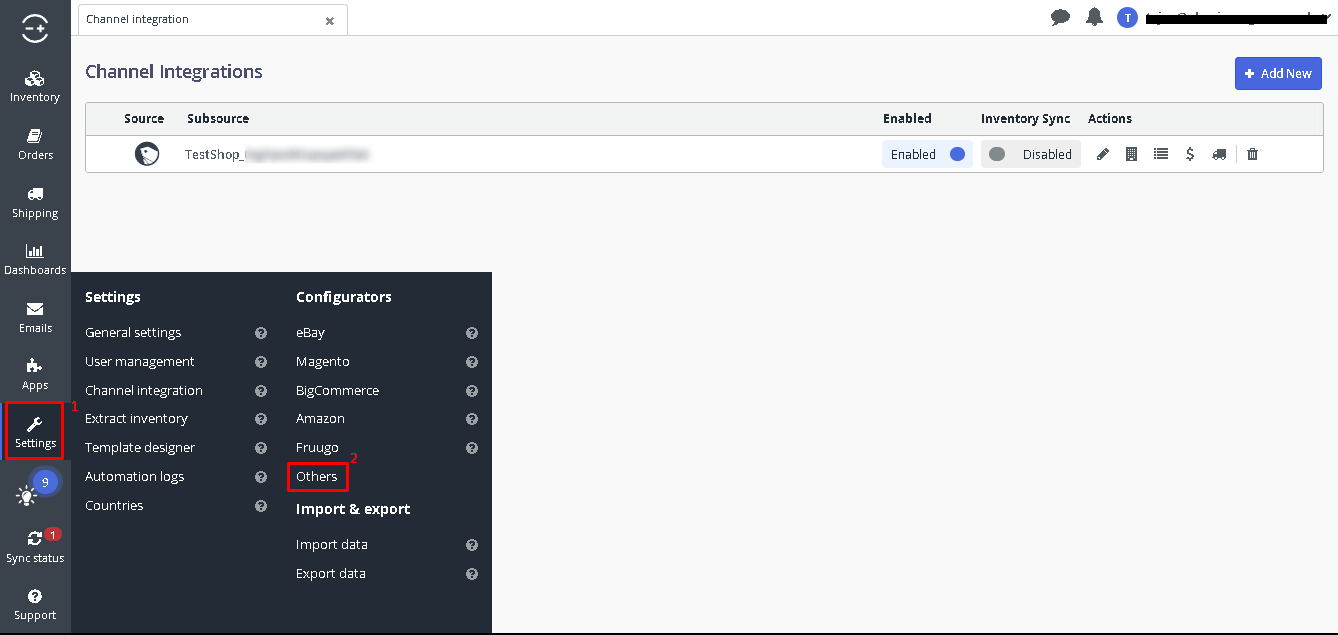
Select “SHOPLINE – Custom Integration” from the drop-down menu. Click on the “Add New” button.
In the configurator wizard screen, add the following details:
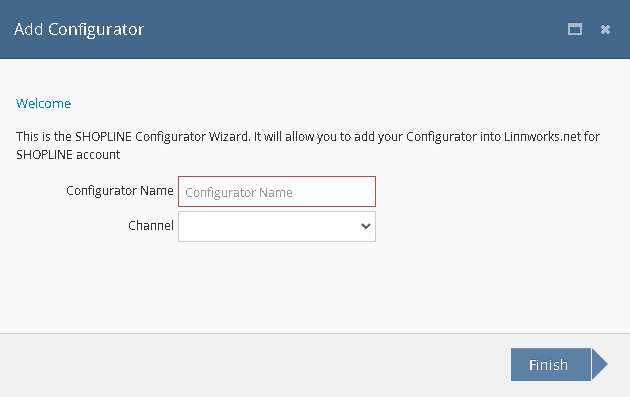
- Configurator Name: Enter a name for the configurator for your convenience. The configurator name can help differentiate between certain groups of items, as the same configurator can be used to create listings for similar items.
- Channel: Select the SHOPLINE account this configurator will use when creating new listings.
Click on the “Finish” button to save details. The configurator is now created, and you can configure other settings.
- Editing a SHOPLINE configurator
When the configurator is created, ensure to configure all the sections. Below, find a detailed guide for each of them.

- Name: The name of the configurator can be edited after creation. Choose a name that will help to recognize the configurator easily when creating listings.
- Templates: Click the “Templates” button to view all listing templates created with this configurator.
- Site: In the Site column, check the SHOPLINE site that was chosen.
- Categories: In the categories window, select the manual/custom collections to use for this configurator. The number on the button will stand for the number of collections that have been selected.
Collections must be set up in the SHOPLINE back-end before appearing in the categories list via Products > Collections.
If there are any changes to the list of collections on SHOPLINE, the configurator will need to be refreshed – click Settings > Refresh Collections to download updated collections from the channel. This will take a few seconds.
Note:– Automated/Smart collection will not be visible in a configurator and, therefore, it can not be set via Linnworks. Items are automatically added to automated/smart collections by SHOPLINE based on the specified conditions on the SHOPLINE back-end.
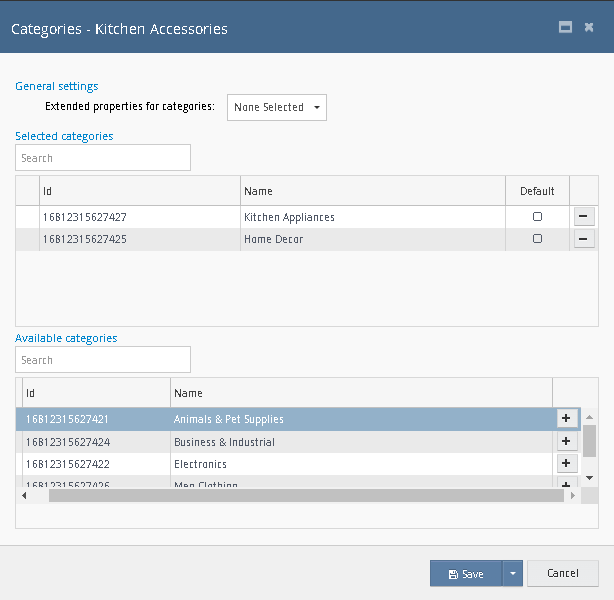
The Categories screen is divided into three parts:
- Available categories: All collections you have created on the channel will be available here. Select the collections wish to use for this configurator by clicking the + button.
- Selected categories: Every listing created via this configurator can use collections from this table. Tick any collection as Default if wish to use a specific collection every time for this configurator.
- General settings: Collection can be mapped through the extended property of the item. select several collections from the drop-down menu.
Click on the “Save” button to save the selection.
- Description: The Description window contains all necessary HTML for the design of the SHOPLINE listing. Add and edit the HTML description for listings created via this configurator.
- Attributes: In the Attributes column, select the attributes wish to use for this configurator. The number on the button in the SHOPLINE Configurators screen will represent the number of attributes got selected.
Four attributes are required by SHOPLINE and must be present on the listing (marked with a red “i” icon). The rest are optional.
The Attributes section consists of two parts:
- Available attributes: Preset attributes from the SHOPLINE back-end you wish to use for this configurator by clicking the + button.
- Selected attributes: Every listing created via this configurator can use attributes from this table. When selected, client can specify where Linnworks should pick the information up from – the item’s extended property or the Default Value column in this screen.
Tick the “Is Variation” box for the attribute that need to be visible in the listing’s child item information.

The attribute start with “Metafield -” Prefix is a product/variation meta fields. See description of the field in tool-tip (by hovering on Yellow “i” icon). Metafields must be set up in the SHOPLINE back-end before appearing in the Attribute list via Settings > Metafields.
- Variations (only for variation listings): To create a variation listing, it must have a variation-compatible configurator with variation attribute(s) added to the Variations column.
For example, it can be color, size, or condition, etc.
So that, each variation child items will have its value that will be available in a drop-down menu on the listing.
Use main item images only: Enable this option to display images on the listing from the main item only and keep all other images disabled.
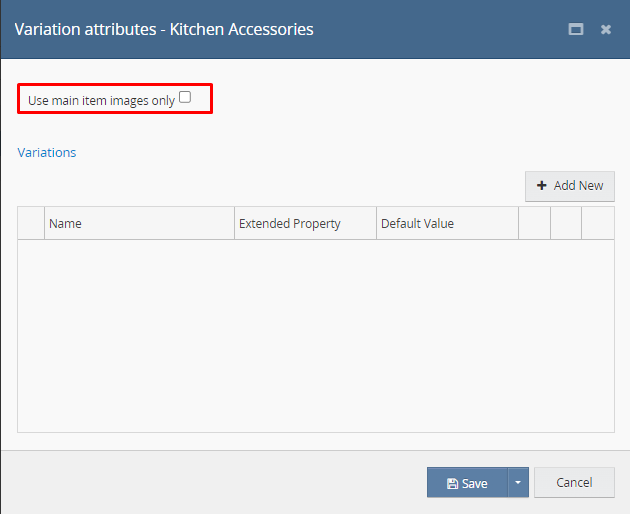
To add a variation attribute:
- Click the“Add New”
- Enter the attribute’s name.
- Click “Add”
- In the Extended Property drop-down menu, select the extended property to use in the template.
- If any variation child items do not have that extended property, use the Default Value field to add a generic value for such items.
- Click “Save” button to save all the configuration.
- Add the Channel column to the My Inventory view
Open a channel view or create a new view from the Default tab to include the needed channel column.
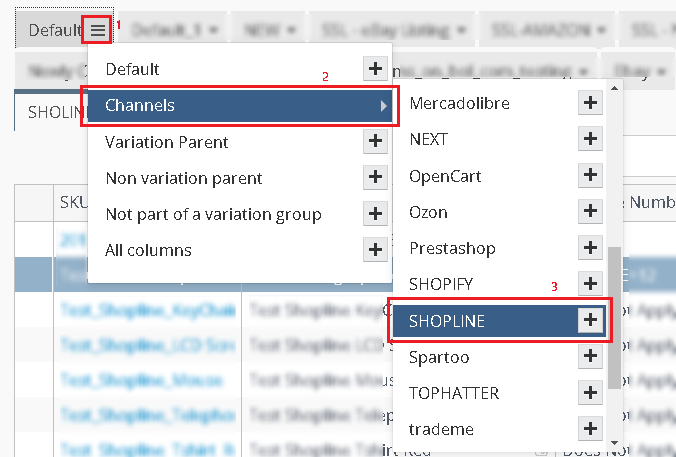
- Open the channel view: Click the following
 icon on the Default tab > Channels > click on the SHOPLINE.
 - Create a new view: Click the following
 icon on the Default tab > Channels >
  button after the SHOPLINE > check view settings > click on “Save” button.
- Select a configurator and create the template(s)
Select one or several items to create templates for them in bulk. Filtering and sorting can help to select a group of items that share common details and can be listed with the same configurator.
Right-click the Channel column for the selected item(s) à “Create listing on SHOPLINE” à select the configurator name. It will be redirected to the listing templates screen.

Review the templates and Send listing information to the SHOPLINE
In the channel templates screen, check that all the details are correct. And then click on the  to start the listing creation on the SHOPLINE. If there is more than one template, select several and click the
  button in the top right-hand corner to start the listing creation for all at once.

Step 10: Revise/Update Listing
When a listing is created or updated, information is always sent in the following order:
SKU > Configurator > Listing Template > SHOPLINE Listing
- The information is picked up from the SKU, its Listing Descriptions, and Extended Properties.
- The information is passed through the configurator, where it picks up the selected attributes and additional information.
- The information is added to the listing template, which passes it to the listing on the SHOPLINE.
Listing updates/revisions work only in this direction. Changes from the SHOPLINE are not passed back to the listing template, and changes on the listing template will not be reflected on the configurator or SKU.
To revise via My Inventory, right-click on the templates column > Revise selected and choose the needed option
Below outlined revision options are available for SHOPLINE.
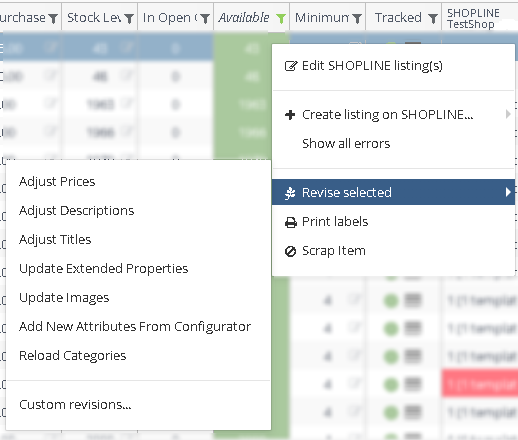
- Adjust Prices: Send item price updates to the SHOPLINE.
- Adjust Descriptions: Send updates on item descriptions to the SHOPLINE.
- Adjust Titles: Send updates on item titles to the SHOPLINE.
- Update Extended Properties: Send updates on the values of any extended properties used in the listing attributes to the SHOPLINE.
- Update Images: This will replace all images on the listing with images from the SKU Images tab.
- Add New Attributes From Configurator: If any new item specifics/attributes are added to the configurator, use this option to push the respective item extended property values to the listing template and SHOPLINE.
- Reload Categories: Refresh the custom collections from the SHOPLINE.
- Custom revisions: Allows you to select one or more of the above-listed options at once.